Nanette's Table
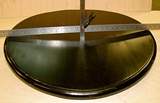
This table arrived at our shop with a really warped top and a request to replace it with a new top of the same diameter. We began by making a new top blank in Baltic Birch plywood, a very nice, flat and stable veneering surface. In order to disguise the plywood edge, the top was cut in the shape of an octagon, then surrounded by 8 pieces of wood so once it was cut into a circle only a solid wood edge would appear.
As the edge was made of 8 pieces, I decided to make the top from 16 pie segments so every second one would align with the edge joints. Sixteen pieces mean each angle is 22.5 degrees, so I cut a template of cardboard to mark each piece of veneer from the flitch.
One of the great things about working with veneer is that pieces which were sliced sequentially are nearly identical as they did actually touch in the living tree. Choosing which portion of the veneer to use is the fun part using the template and a pair of mirrors which gives a very accurate preview of the final pie-segment pattern.
Once the area of veneer is chosen it's just a matter of using the template to align recognizable features in the grain with the corners of the template. Each one is then marked with a sharp pencil then a straight- edge and veneer saw are used to accurately cut the 16 (hopefully) identical triangles.
The joining process begins by planeing the edges to obtain a good glue joint, then taping them together in pairs. Piece #1 is joined to #2, piece #3 to #4, and so on. Once each joint is fully taped the pattern is bent backwards on itself and a tiny dab of glue is used to the joint line. Once the glue is cured all of the tape comes off and the two pieces are permanently connected and every bit as strong as a single piece of veneer.
With 8 pairs joined together, the pieces are planed again and joined to form the quarters. With the quarters complete they are checked to confirm a 90 degree angle. ( I now know why hockey teams so often say: "Things were going great until we hit the quarter-finals.") A few minor adjustments and the quarters were joined into the two halves, which were then adjusted and the final circle was taped and glued.
The trick used to make sure the veneer segments were centered on the plywood substrate was to place a tiny finishing nail in the centre of the plywood circle which was just allowed to poke through the point where all of the veneer segments met.
Once the veneers were pressed onto the circle and trimmed, a few coats of urethane were applied and the table was ready to head home.


